
If you’ve ever dreamed of creating your own smart gadgets or exploring the Internet of Things (IoT), there’s one project that’s sparking serious buzz among tech lovers — the Antennino DIY IoT Antenna Project.
Affordable, beginner-friendly, and packed with potential, Antennino isn’t just another circuit board — it’s a gateway to understanding how wireless communication really works. Whether you’re into home automation, environmental sensors, or just tinkering with tech, this little device opens up big opportunities.
Let’s break down what makes Antennino such a standout project, how it works, and why it’s quickly becoming a favorite in the DIY IoT community.
1. What Exactly Is the Antennino DIY IoT Antenna Project?
At its core, Antennino is a compact, low-power development board built for IoT experimentation. It’s designed to help you create and connect wireless devices — from smart home sensors to environmental monitors — using efficient antenna technology.
Think of it as a bridge between your curiosity and the world of connected devices. It’s lightweight, easy to assemble, and fully compatible with Arduino, so you can program it with familiar tools and libraries.
With Antennino, you don’t need expensive lab gear or advanced coding skills — just a willingness to learn, test, and explore.
2. Why IoT Projects Are So Popular (and Fun)
IoT is everywhere — in our homes, cars, cities, and even fitness trackers. What makes IoT projects like Antennino exciting is the mix of creativity, problem-solving, and innovation they inspire.
Here’s why tech enthusiasts are drawn to IoT:
-
Automation is addictive — Who doesn’t love building devices that think for themselves?
-
Endless applications — From smart lighting to soil sensors, there’s always a new idea to try.
-
Hands-on learning — You get to understand how data, sensors, and connectivity come together.
-
Career-ready skills — IoT projects sharpen your coding, electronics, and system design abilities.
Antennino fits perfectly into this movement, offering an affordable way to join the IoT revolution while learning practical skills.
3. Key Features That Make Antennino Stand Out
So, what sets Antennino apart from the sea of development boards out there? A few smart design choices make a big difference:
-
Low power consumption: Ideal for battery-operated devices that need to run for months.
-
Wireless-ready: Built with the RFM69 module for reliable long-range communication.
-
Compact design: Fits easily into small enclosures or wearable tech projects.
-
Arduino compatibility: Use familiar tools to program and customize your projects.
-
Energy-efficient architecture: Perfect for eco-friendly designs and remote sensors.
Essentially, Antennino is a balanced mix of power, simplicity, and flexibility — the sweet spot for DIY creators.
4. Affordable Innovation: Is It Worth €30?
At around €30, Antennino hits a sweet price point.
That modest investment gives you a versatile IoT development platform with impressive functionality. Considering what similar boards cost, it’s one of the best budget-friendly tools for anyone serious about experimenting with connected systems.
For the price of a few coffees, you get hands-on experience with antenna systems, power management, and wireless data transfer — all the essentials of modern IoT.
5. Antennino and the Power of Low-Energy Design
One of the coolest things about Antennino is its focus on energy efficiency. IoT devices often need to work for long periods without being plugged in — sometimes in hard-to-reach locations.
Antennino solves this challenge with advanced low-power management techniques. It can sleep when idle and wake up only when needed, drastically extending battery life.
For instance:
-
Motion sensors can stay active for weeks on a coin cell battery.
-
Environmental monitors can collect data periodically without constant drain.
This smart energy design means you spend more time building and less time recharging.
6. Power Options: Flexible and Reliable
Antennino gives you multiple ways to power your creations.
-
USB Power: Perfect for stationary prototypes on your desk.
-
Battery Power: Ideal for portable or remote projects.
Because of its low-power profile, even small batteries can keep your device running for weeks or months. That makes Antennino incredibly flexible for any project — whether you’re setting up a backyard weather station or testing sensors in the field.
7. RFM69: The Wireless Heart of Antennino
Let’s talk about connectivity — the heart of any IoT project.
The RFM69 module integrated into Antennino is a game-changer. This compact transceiver allows your devices to communicate over long distances, even through walls or outdoor environments.
You can:
-
Send data from a temperature sensor to a base station.
-
Link multiple devices in a home automation setup.
-
Experiment with mesh networking.
Despite its strong performance, the RFM69 keeps power consumption minimal, making it perfect for real-world IoT use.
8. How the Antenna and Display Boost Functionality
The name “Antennino” says it all — the antenna is central to the design. Its optimized layout enhances signal strength and reliability, ensuring consistent communication between devices.
Pair that with an optional display module, and you can visualize your data instantly. Imagine checking real-time temperature, humidity, or motion readings right from your project — no computer required!
This combo of powerful connectivity and user-friendly visualization makes Antennino an incredibly complete DIY solution.
Also Read : xvif Decoded, The Powerful Guide You Need
9. Tips for Getting the Most Out of Your Antennino IoT Project
To make your experience smoother and more rewarding, keep these tips in mind:
Plan Before You Build
Sketch out your circuit and data flow before assembling. This helps avoid messy rewiring later.
Use Power Wisely
Experiment with sleep modes and efficient code. The LowPower library is your best friend here.
Stay Organized
Keep notes on every test, tweak, and idea — it’s invaluable when you expand your project later.
Join the Community
Online maker forums are gold mines of advice. Engage, share your progress, and learn from others.
Start Small, Then Scale
Don’t dive into a complex automation network right away. Begin with a single sensor or device, then grow from there.
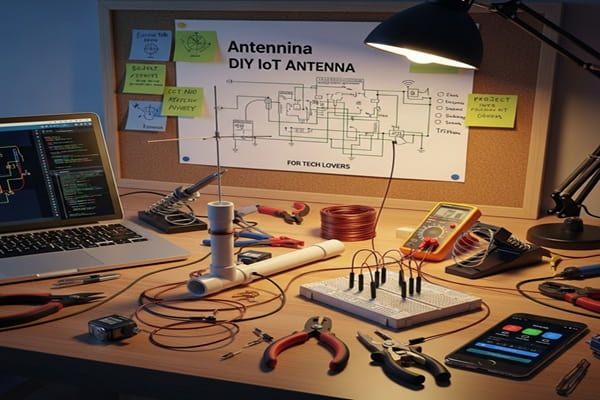
Understanding the Circuit Design
If you’re a tinkerer, this part will excite you. The Antennino circuit diagram reveals an efficient design where each component serves a key role:
-
Resistors and capacitors stabilize performance.
-
Connectors allow modular expansion.
-
RFM69 module ensures smooth data transmission.
Everything is optimized for both reliability and power efficiency, helping you create sturdy, long-lasting devices without unnecessary complexity.
Why Antennino Is a Must-Try for Tech Hobbyists
The Antennino DIY IoT Antenna Project isn’t just another electronic kit — it’s a launchpad for creativity.
Here’s why it’s worth your time:
-
It teaches real-world IoT concepts hands-on.
-
It supports Arduino, making it beginner-friendly.
-
It’s energy-efficient and affordable.
-
It helps bridge the gap between theory and application.
Whether you’re building smart irrigation systems, home alarms, or portable sensors, Antennino gives you the tools — and confidence — to make it happen.
Conclusion: Build, Learn, and Innovate with Antennino
The Antennino DIY IoT Antenna Project offers something truly special — the freedom to experiment, learn, and innovate without barriers. It’s simple enough for beginners yet powerful enough for professionals looking to prototype advanced systems.
By embracing this project, you’ll not only sharpen your technical skills but also join a growing community of creators shaping the future of connected technology.
So, if you’ve been looking for the perfect entry point into IoT — one that’s fun, affordable, and genuinely rewarding — Antennino is your next big step.